Posts

Showing posts from October, 2019

PULP contemporary research

Image
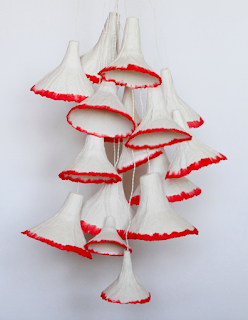
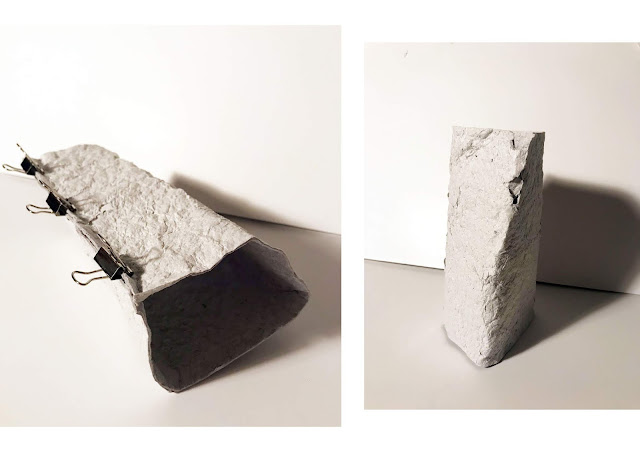
https://www.upcyclist.co.uk/2017/02/10-eco-chic-lighting/ https://www.upcyclist.co.uk/2016/01/vessels-made-from-paper-pulp-by-debbie-wijskamp/ https://www.eternitystew.com/Formulations https://www.eternitystew.com/Paper-Islands Sculptures are made with paper fiber and plaster or paper pulp; acrylic paint, cut painted paper, metal leaf, and pigmented concrete.

PULP structures

Image
PULP structures made using flat sheets of partially dry paper dyed with blue ink. The two images below were made using a semi dry piece of paper. I moulded the paper on the insisde of a bowl. This created cracks in the bottom of the bowl as i had to push it in to form the shape. For the next pot, I draped the paper over a jar and created folds to both mould it and create some texture. Although i'm pleased with the stability of this piece i think the folds make the piece look too messy and not the look i'd like to achieve. This was the most successful of the tests as the shape is really strong and can actually be used to store pens etc. as it holds itself up well. I also really like the texture that has been pressed into the paper from the tea towel it was placed on to dry. I want to try imprinting various other patterns into the paper to give them a more interesting, decorative look and to maybe make them look less like paper. Research for my CP3 ess

PULP development 2

Image
After producing a flat piece of paper, as shown in previous post, i left it to dry completely. This took about 5 days. I then tried to shape it just creating folds to test how well it could be moulded. The video above shows a piece that had come apart from the large piece due to the paper being made up of six small pieces. I found the paper too brittle to bend into a nice curve and the more i played around with it the more it cracked and began to fall apart. I then used the bigger piece and tried to bend it on a straight line as oppose to a curve. This worked slightly better but still created cracks. After i had folded it i decided to spray it lightly with water to soften the corners. This allowed me to create softer corner and to push the cracks back together. Currently, the open seam is held together by bulldog clips. I have wet the edges and i'm hoping that they'll start to fuse together. I don't think this method works as i'd like it to as i can

PULP Development

7th October PULP development  Evident in the previous blog post, my pulp pieces have not been very successful thus far. I decided to proceed with the project i needed to switch up the method drastically, my main problem before was the removal of the pieces from their mould.  My plan to eliminate that problem is to make flat pieces of paper pulp and mould them once they are dry/partially dry. This stage of the experimentation will focus mainly on drying time and thickness of the paper. The videos above show the process of making flat sheets of paper using a frame and deckle and pulp. Since my frame is so small i am attaching 6 pieces together to allow me to create larger pieces. The problem with pushing them together is that you end up with weak points in the paper so i will try and craft a larger frame using a photo frame and some fine mesh of some sorts. I'm going to leave this piece to fully dry and then mould it into a shape. In the meantime i will continu

PULP

Image
23rd September  PULP AIM - use recycled paper waste to create pots, vases and bowls that can be used in a variety of ways (both functional and decorative) How will i find the best method? test different types of paper different ways of moulding the vessels different ways of adding colour  different soaking times/amount of water length of drying time before de-moulding adding in other materials? thickness of paper - how does it affect stability/ability to dry fully First test -Using waxy papers and crushed broken old paper bowls and tissue.  -Using a mix of fibres to see if that allows the pulp to hold together better. -Left to soak for a couple of hours then blended with a lot of water -Applied to mould still quite wet and applied in a medium thickness. Thickness worked well/held together relatively well but the removal from the mould is what cracked the edges - need to find a better way of doing that. Maybe grease mould/add a laye